So you’ve just started your journey as a beginner nail artist, and you’ve spent hours perfecting your gel nails. But, when you look down at your creation, something feels off. Maybe they’re lumpy, maybe the shine isn’t as intense as you imagined, or maybe they look like… croissants? We’ve all been there, and trust us — it's completely normal to make mistakes as a newbie in the world of gel nails.
If you’ve had any of these experiences, don’t panic! Whether you’re struggling with texture, curing issues, or lifting, we’re here to help. Read on for common beginner nail artist mistakes and how to fix them, plus gel nail tips to help you avoid the most common disasters.
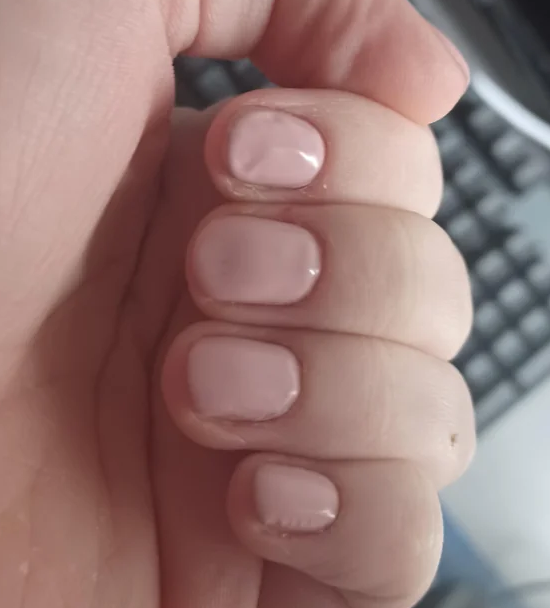
1. Uneven Gel Layers (aka Gel Nails That Look Like Croissants)
When your gel nails don’t look smooth and sleek, it’s often a result of uneven gel application. If the gel is too thick in some places or too thin in others, you might end up with a lumpy texture — or, worse, nails that look like flaky pastries.
Why It Happens: In your enthusiasm, you might apply too much product in certain spots or not enough in others. This can lead to uneven curing and gel that doesn’t set properly, resulting in less-than-perfect nails.
The Fix: To avoid this, use thin, even layers of gel polish for each coat. Apply the gel slowly and carefully, making sure it spreads evenly. Curing properly under your UV or LED lamp is also key. This will help ensure that your nails don’t end up looking like a mess — instead, they’ll have that sleek, professional finish you’re aiming for.
2. Not Curing Your Gel Nails Long Enough
Ah, the rush to move on to the next step. If you’ve cut corners by not curing your gel nails long enough, you might notice they feel sticky, or worse, they don’t set at all.
Why It Happens: As a beginner nail artist, you might skip curing steps in your excitement to finish the look. Not curing the gel layers for the recommended time can leave your nails vulnerable to smudging and won’t give you the crisp, shiny look you’re after.
The Fix: Make sure you cure each layer thoroughly. Our recommended LED lamp ensures a perfect cure, leaving no sticky residue behind. Pay attention to the curing time in your gel product’s instructions and give your nails the time they need to set. Patience = perfection!
3. Lifting Gel Nails
If you’re seeing lifting at the cuticles or around the edges, your gel nails might not be adhering properly. This is a common issue for those just starting out with gel nails.
Why It Happens: Lifting typically happens if the nail prep isn’t done properly. This can also occur if there’s excess oil or moisture on the nail before applying the gel.
The Fix: Make sure you properly prep your nails by buffing the surface to remove oils and any debris. Apply a nail dehydrator and primer to ensure a strong bond between the gel and your nail. Proper prep is essential to avoid lifting, and it’s a step that will pay off in long-lasting, beautiful nails.


4. Not Using Professional Gel Tools (Your Gel Nails Will Thank You)
A mistake that many beginners make is choosing lower-quality gel nail products. Whether it’s your gel polishes, tools, or UV/LED lamps, using subpar items can drastically affect the final result of your gel nails.
Why It Happens: When you’re just starting out, it’s tempting to pick up inexpensive products to save some cash. But using low-quality materials can affect your nails’ durability and appearance.
The Fix: Invest in high-quality gel polishes and tools. Our premium gel polishes are designed to give you vibrant, long-lasting colors with smooth application, while our top coats and base coats ensure a professional finish every time. Don’t skimp on tools like nail buffers and files either — professional-grade tools give you more precision and a much cleaner result.
Наш последний контент
Узнайте, что нового в нашей компании!
5. Too Much Gel on the Brush
You’re a beginner nail artist, and you want to make sure your gel covers everything in one go — but adding too much gel can lead to a messy situation. It can run onto your skin or cuticle area, causing a smudgy mess.
Why It Happens: When you’re trying to cover your nails quickly, you may dip your brush into the gel pot too deeply, resulting in an overload of product.
The Fix: Use small amounts of gel at a time. Build up thin layers, curing each one before adding the next. A lighter touch gives you more control, preventing any spillover or unwanted product on your cuticles. Our nail files and cuticle care tools can also help clean up any accidental gel spills around the edges.
Final Thoughts: Nail Training in Spain and Mastering Gel Nails Takes Practice - You Got This!
Mastering gel nails as a beginner can be challenging, but it’s absolutely doable with the right training and tools. Whether you’re practicing at home or taking professional nail training in Spain, learning the ins and outs of gel application will help you avoid mistakes like those pesky croissant nails.
If you're ready to take your nail art skills to the next level, our Perfecting Professional Gel Nail Course is the perfect fit for beginners like you. Plus, when you shop our high-quality gel products and tools, you’ll be equipped to achieve flawless nails every time.
Say goodbye to beginner blunders, and hello to perfect gel nails — your clients will thank you!